WATERMELON FRUIT ROLL-UPS

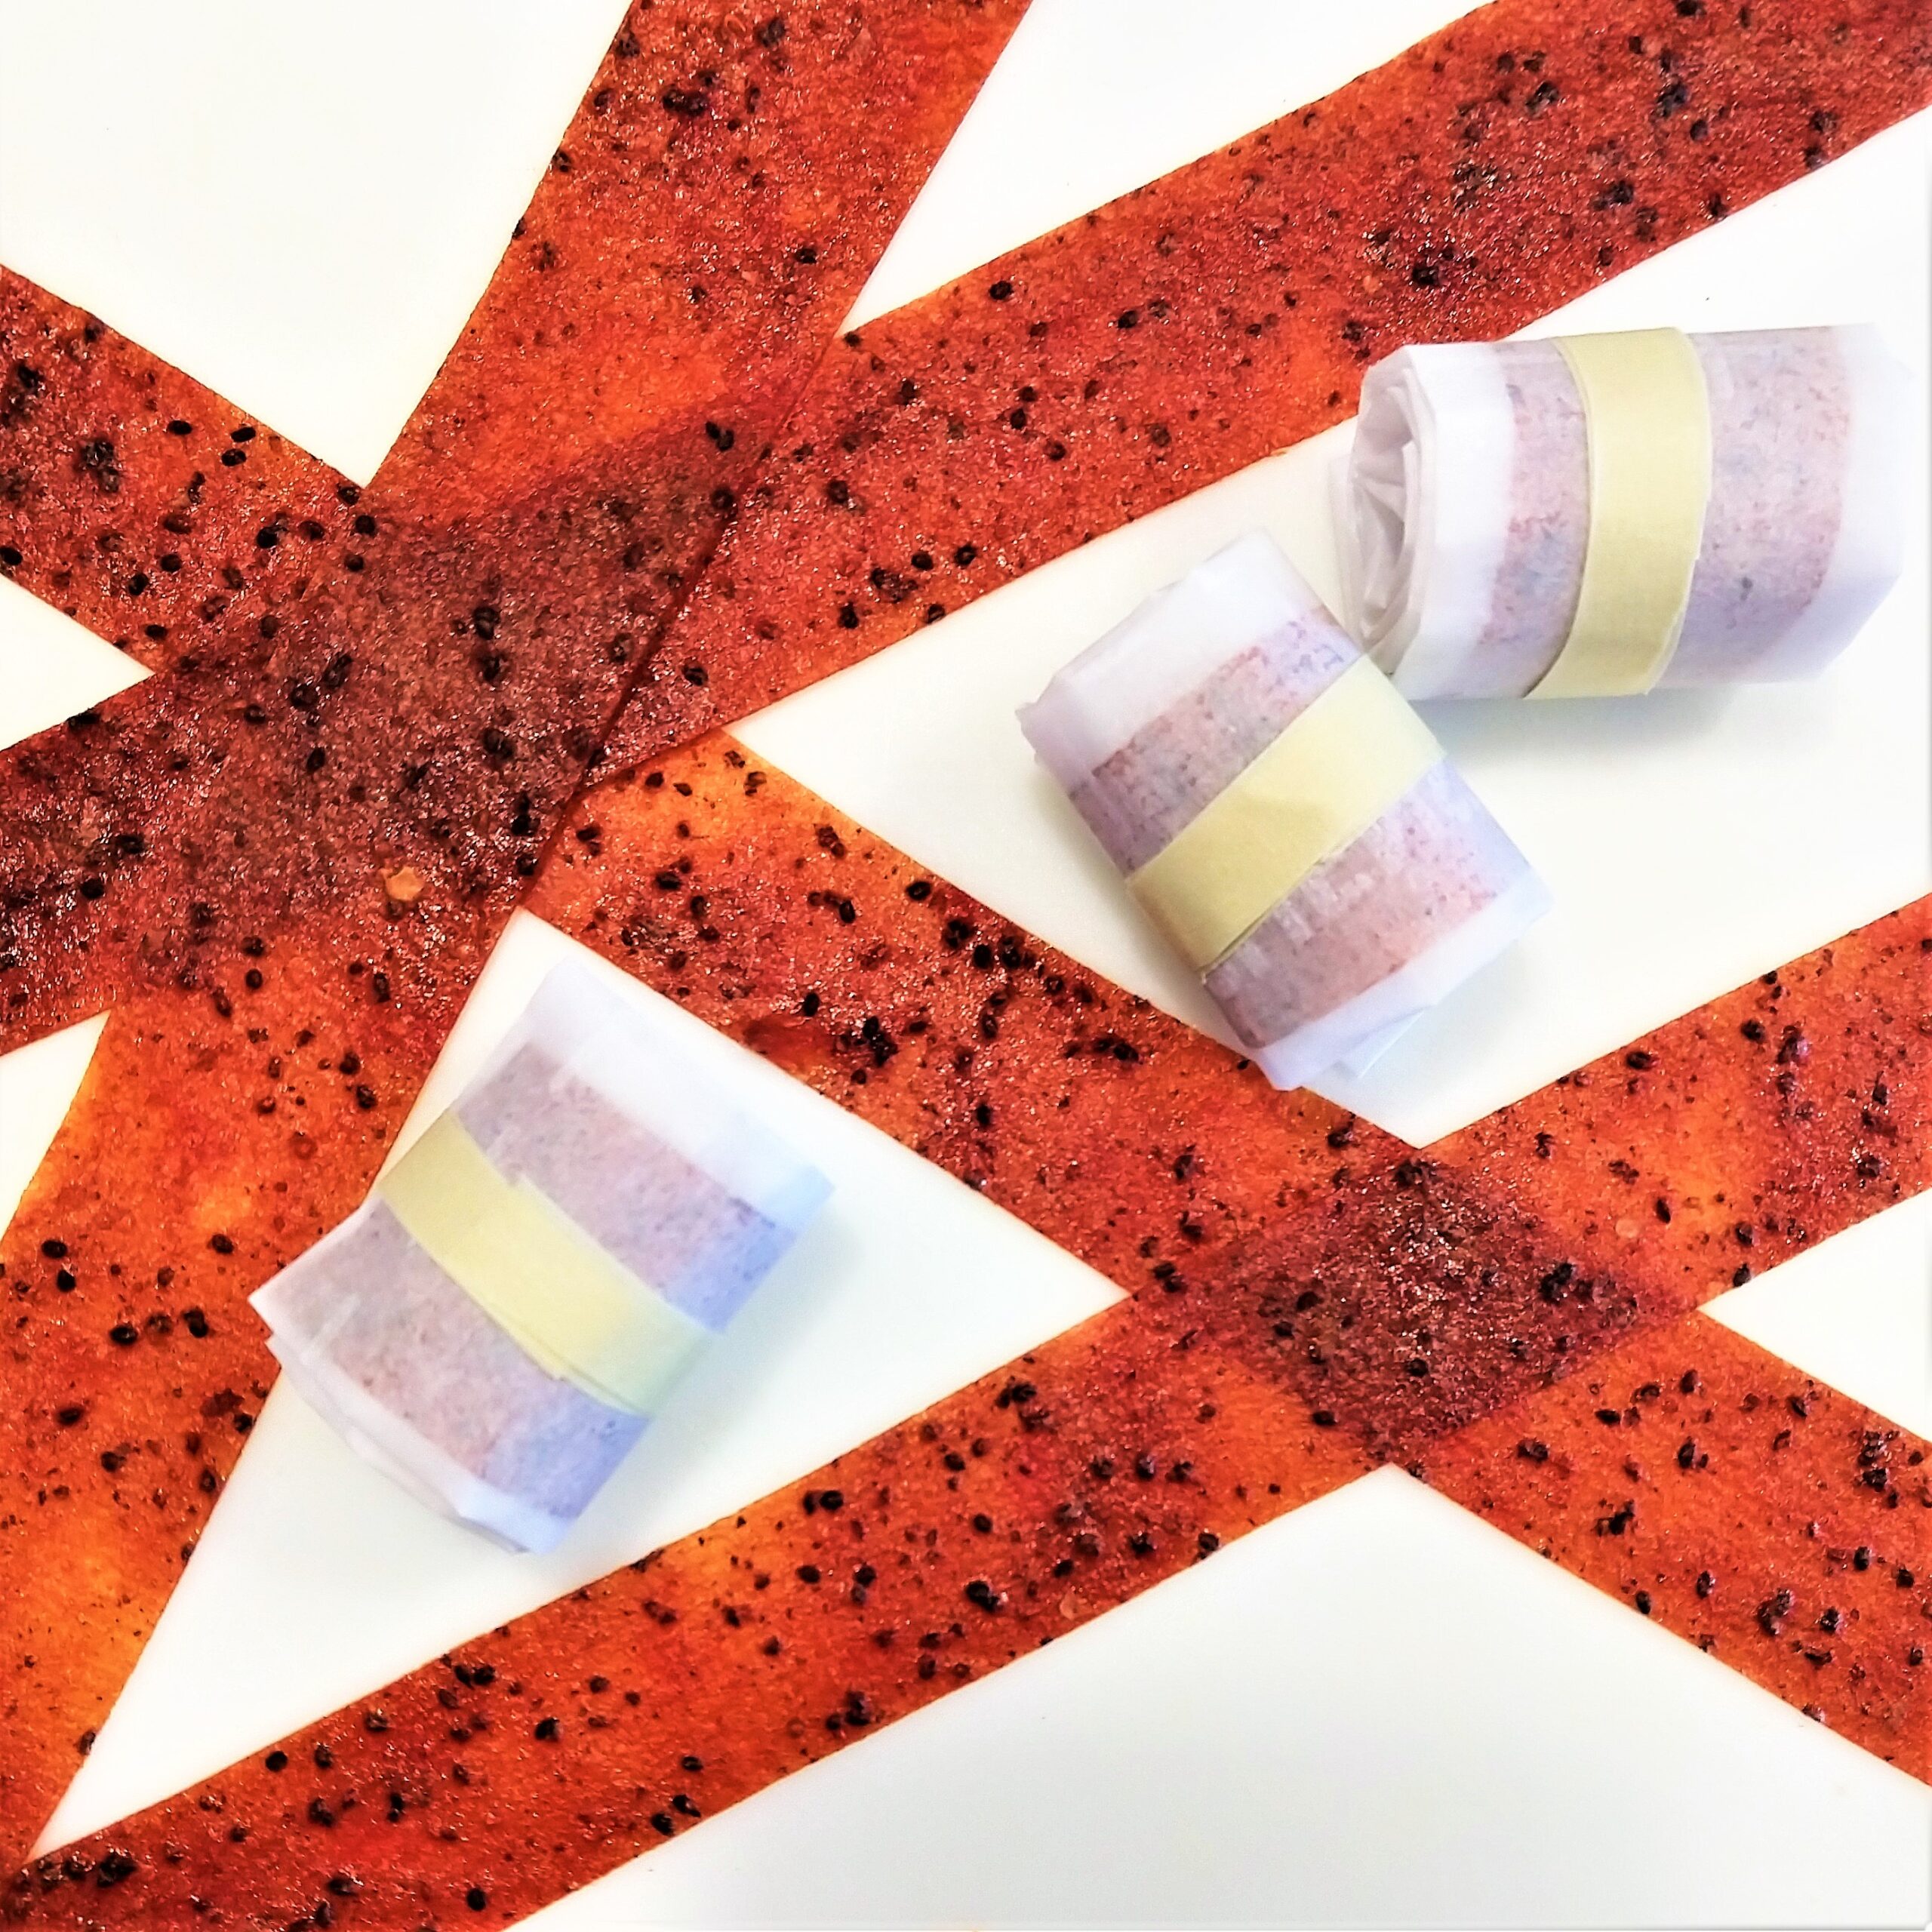
In our household of two, it takes dedication to get through a whole watermelon. It’s even trickier with a lackluster melon (and can we all agree that seedy melons taste best?). Ever since I’ve gotten hooked on making homemade fruit leather, less fruit goes to waste in our house! After some careful experimentation, we now turn excess watermelon into healthier versions of Fruit by the Foot™ or Fruit Roll-Ups™ that don’t include all that plastic trash. For our upcoming vacation, we have compact, portable snacks to take through the airport instead of bulky containers of fruit. The resulting juice can also be made into a syrup for summer-y drinks, too!

WATERMELON LEATHER HIGH

Prep:

20-30 min

Cook:

7 hrs

Total:

7.5 hrs

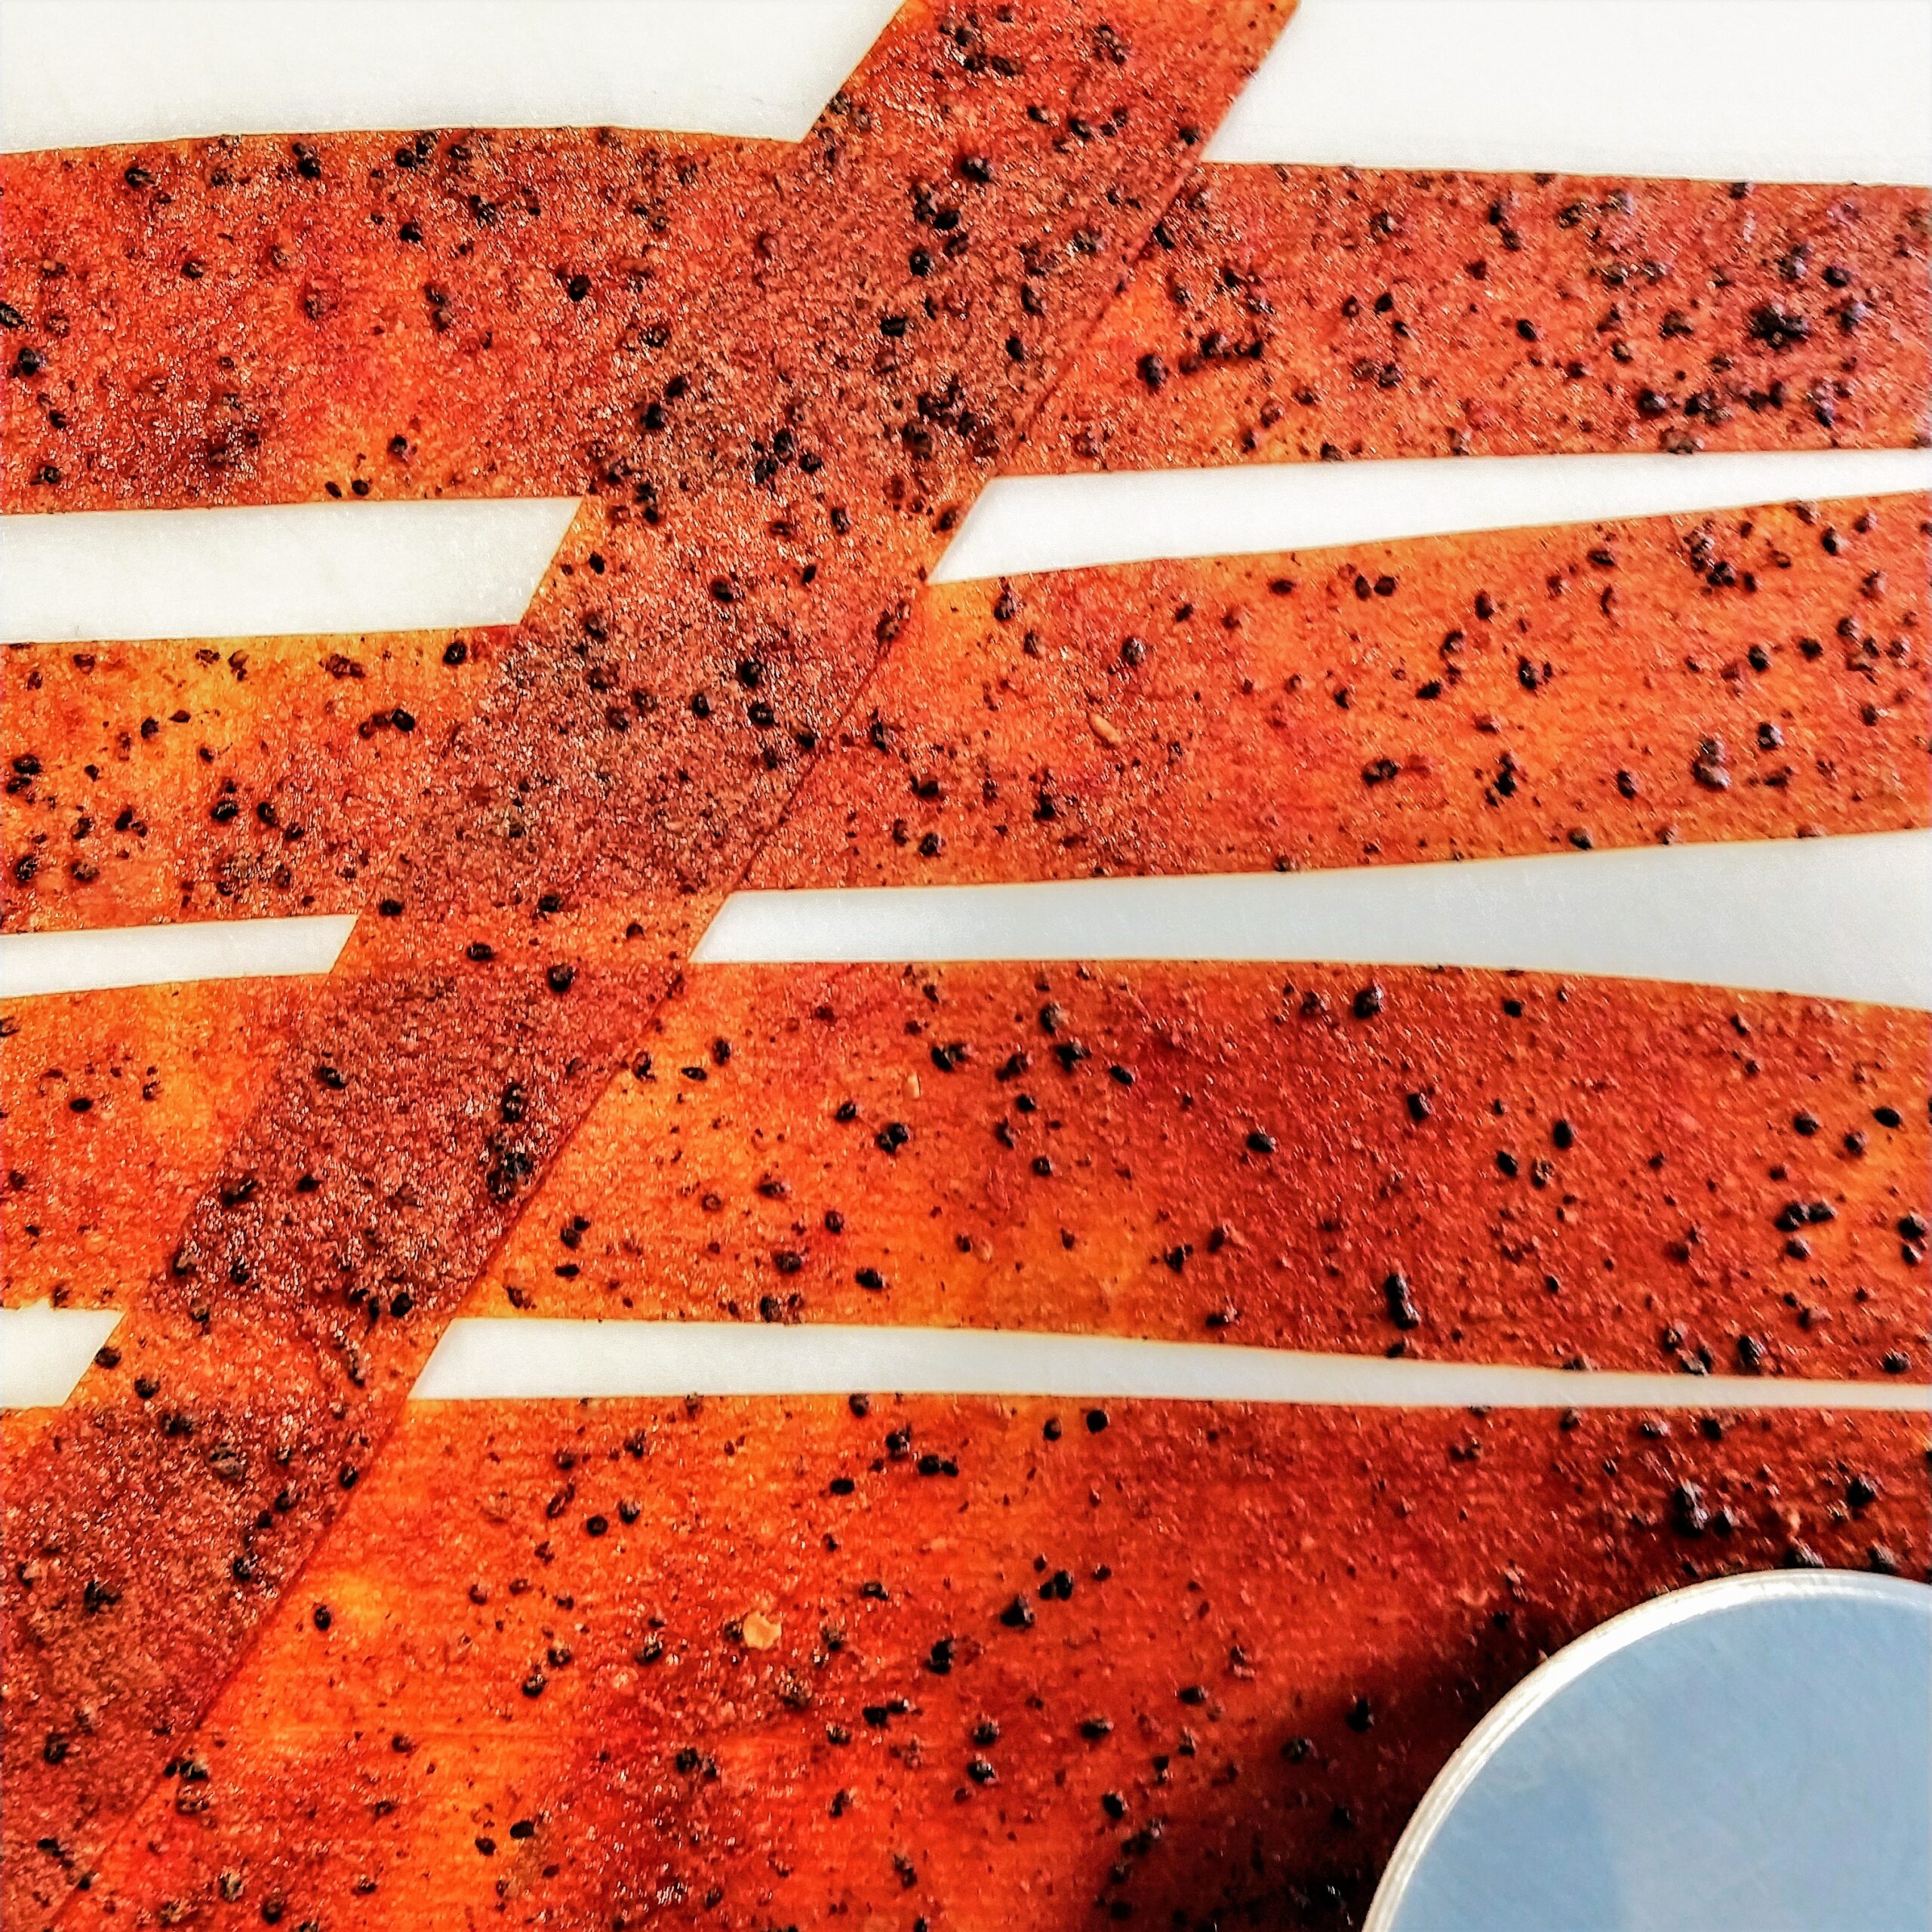
Makes 7 servings, going with each being about 1 x 12 inches long using 9 x 13 inch baking tray (~22.86 x 33.02 cm).

COOKING NOTES:
This recipe is based in a standard oven, without using a food dehydrator or drying settings. Those methods require different times, but the preparation steps are the same. Additionally, you only need to be hands-on for a tiny bit of the time. If you don’t have 6-7 straight hours to bake the leather, you can take it after some time, let it cool completely, cover it and resume baking later in the day. I’ve often made the puree a day ahead, stored it in the fridge, then baked it on a weekend day.

INGREDIENTS:

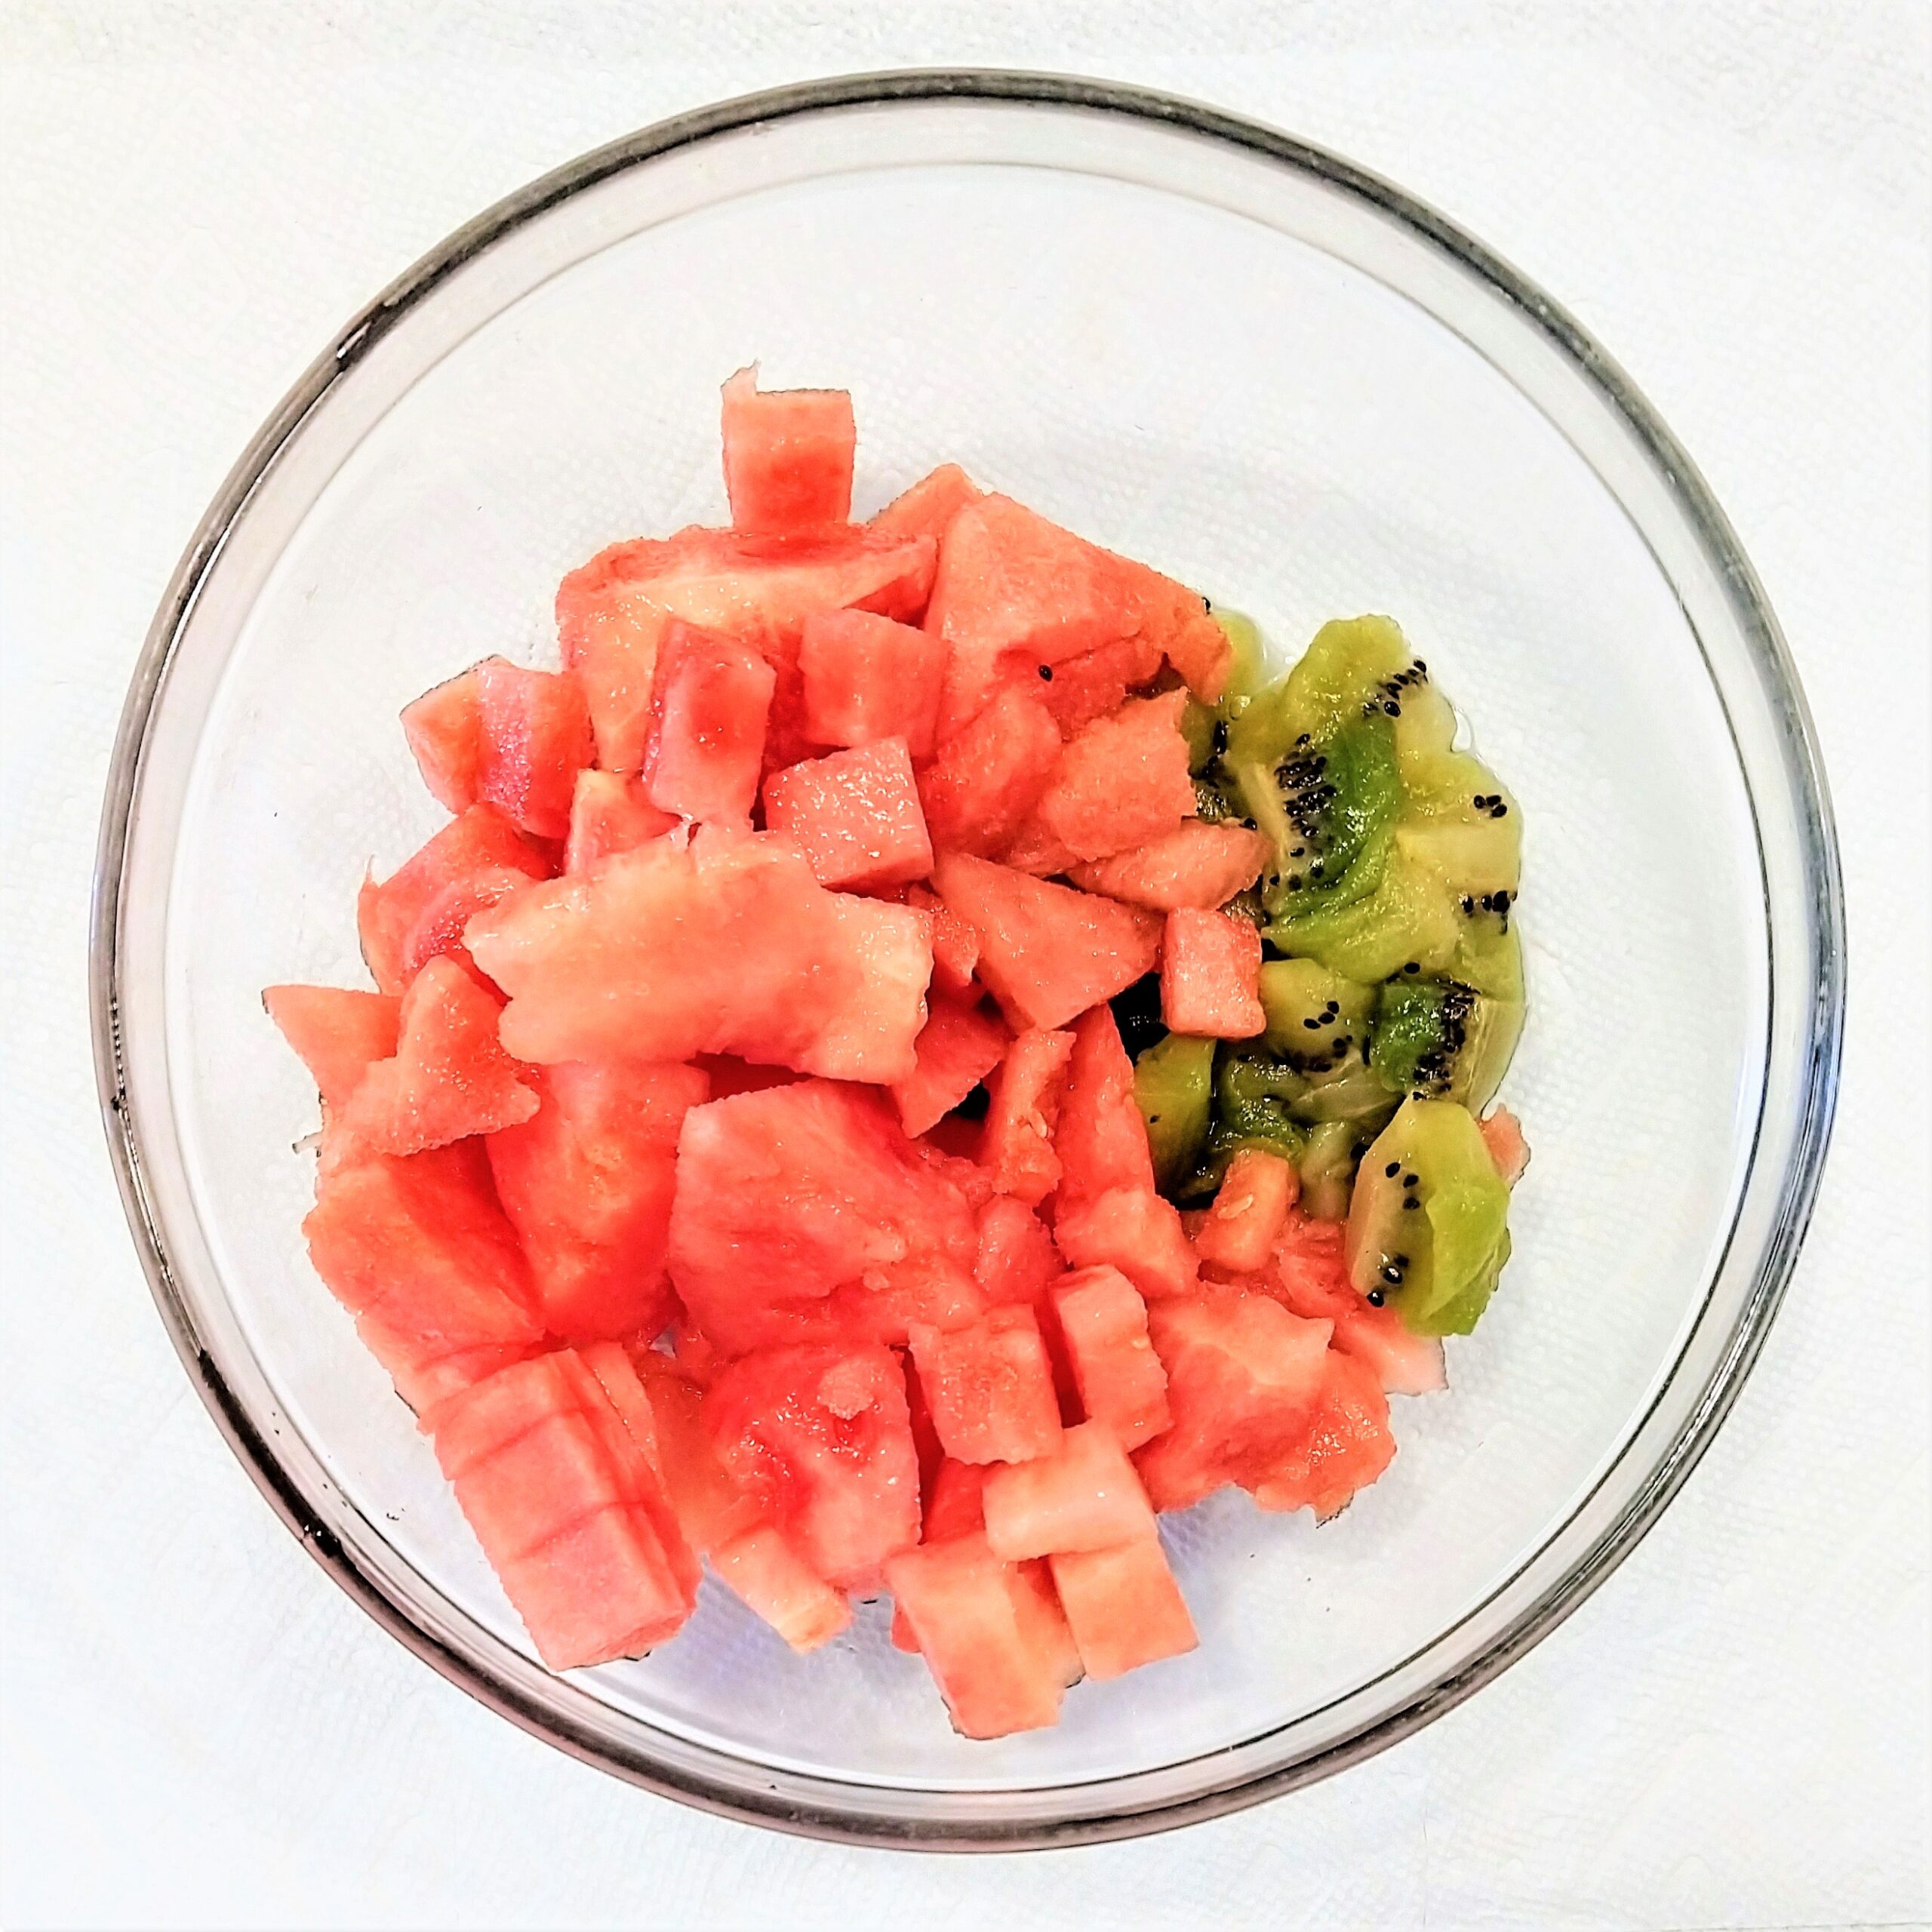
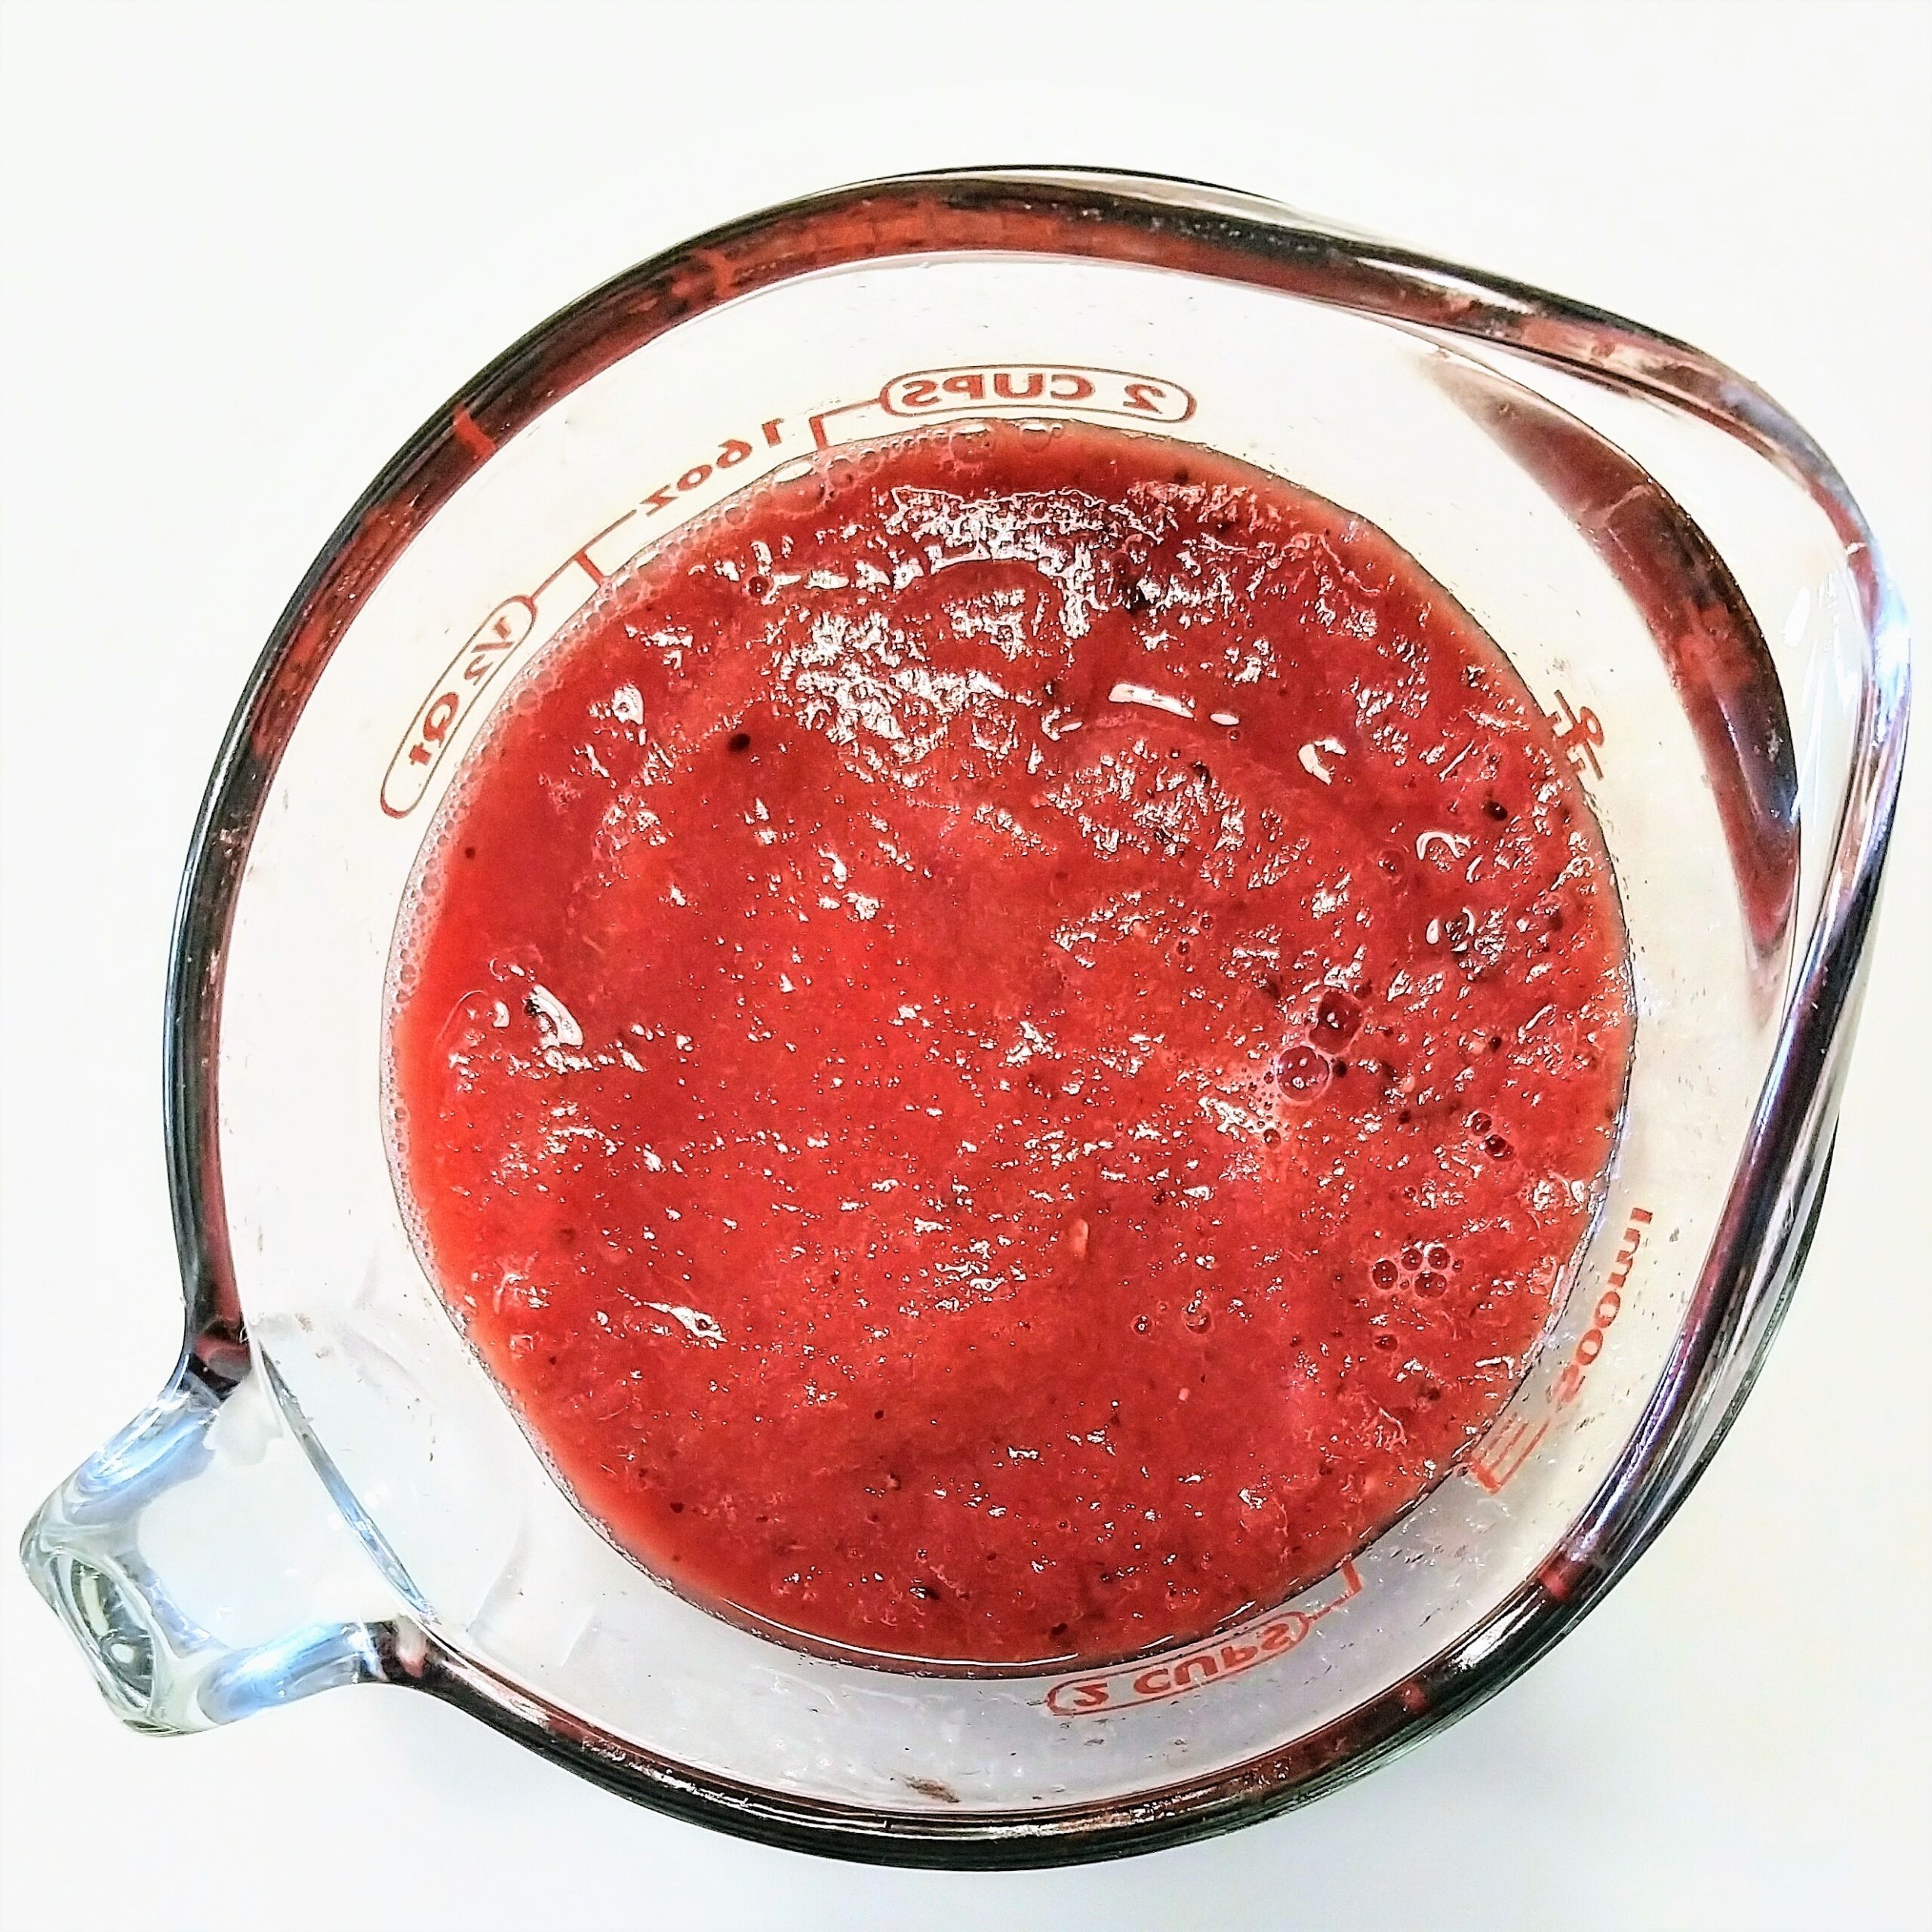
  • 2 heaping liquid cups (~500 ml) of puree*
  • 2 tsp lemon or lime juice**
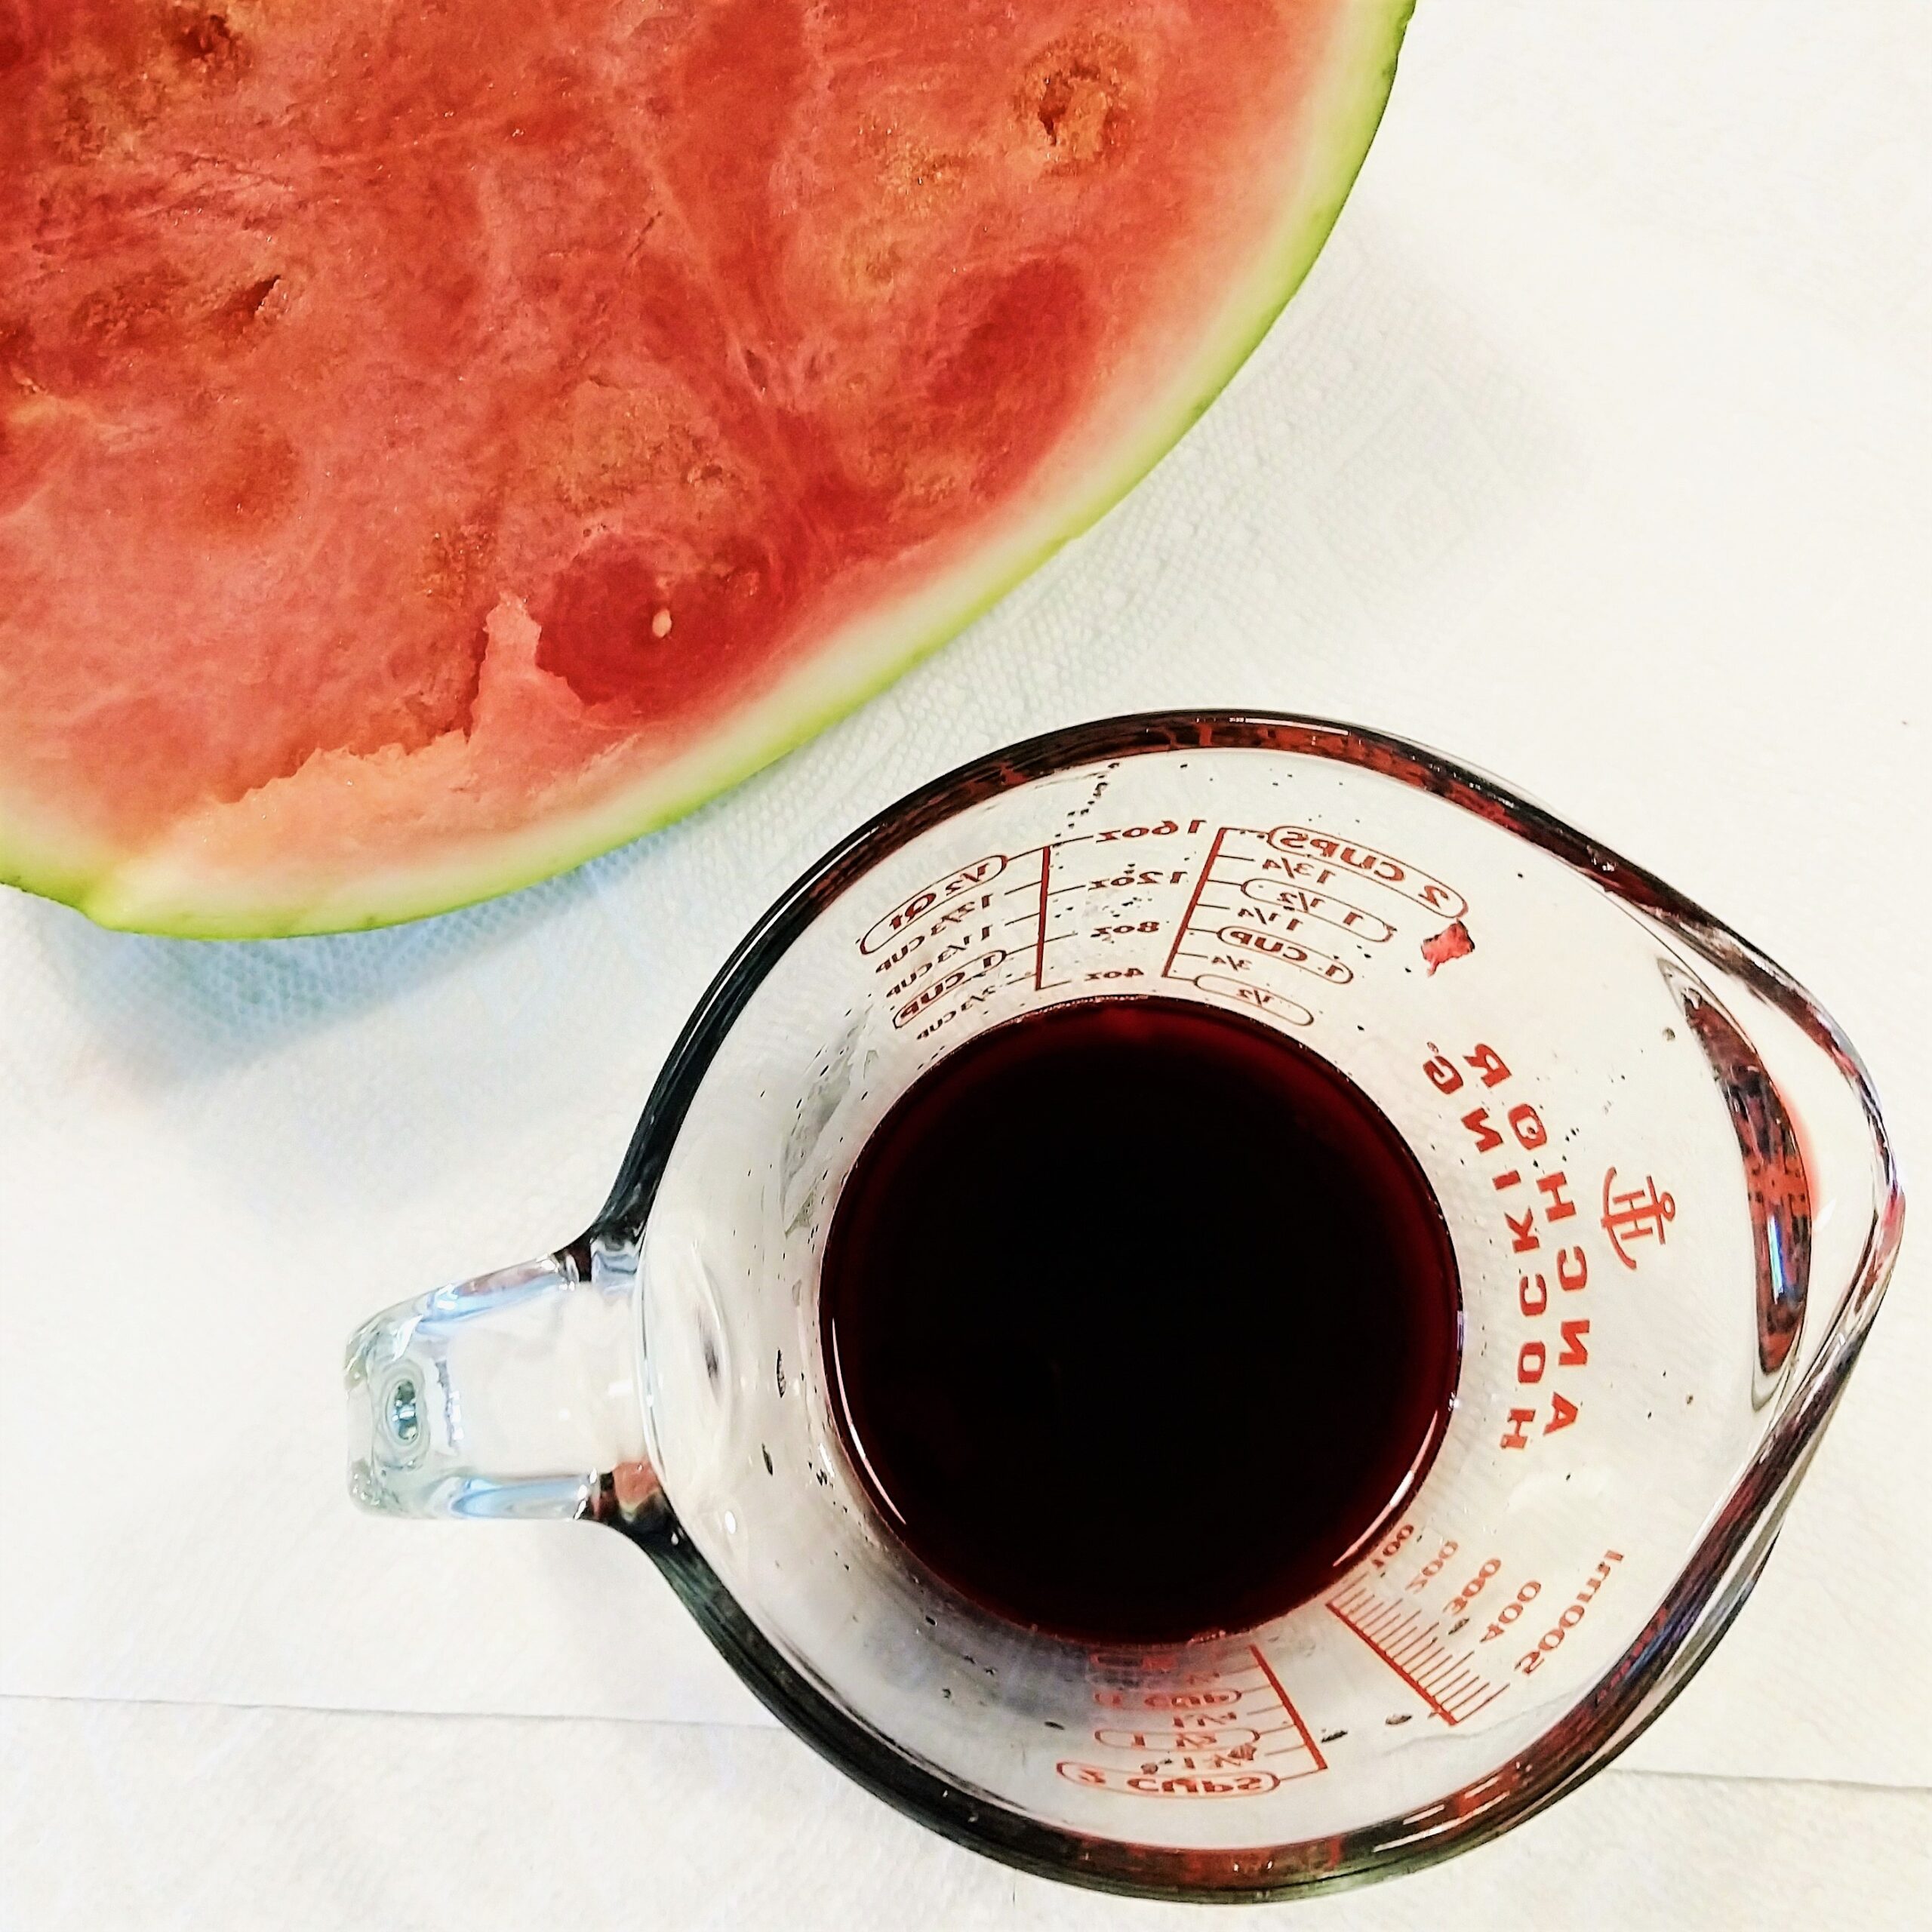
  • ½ cup (~118 ml) liquid (water, beet juice for color, etc)

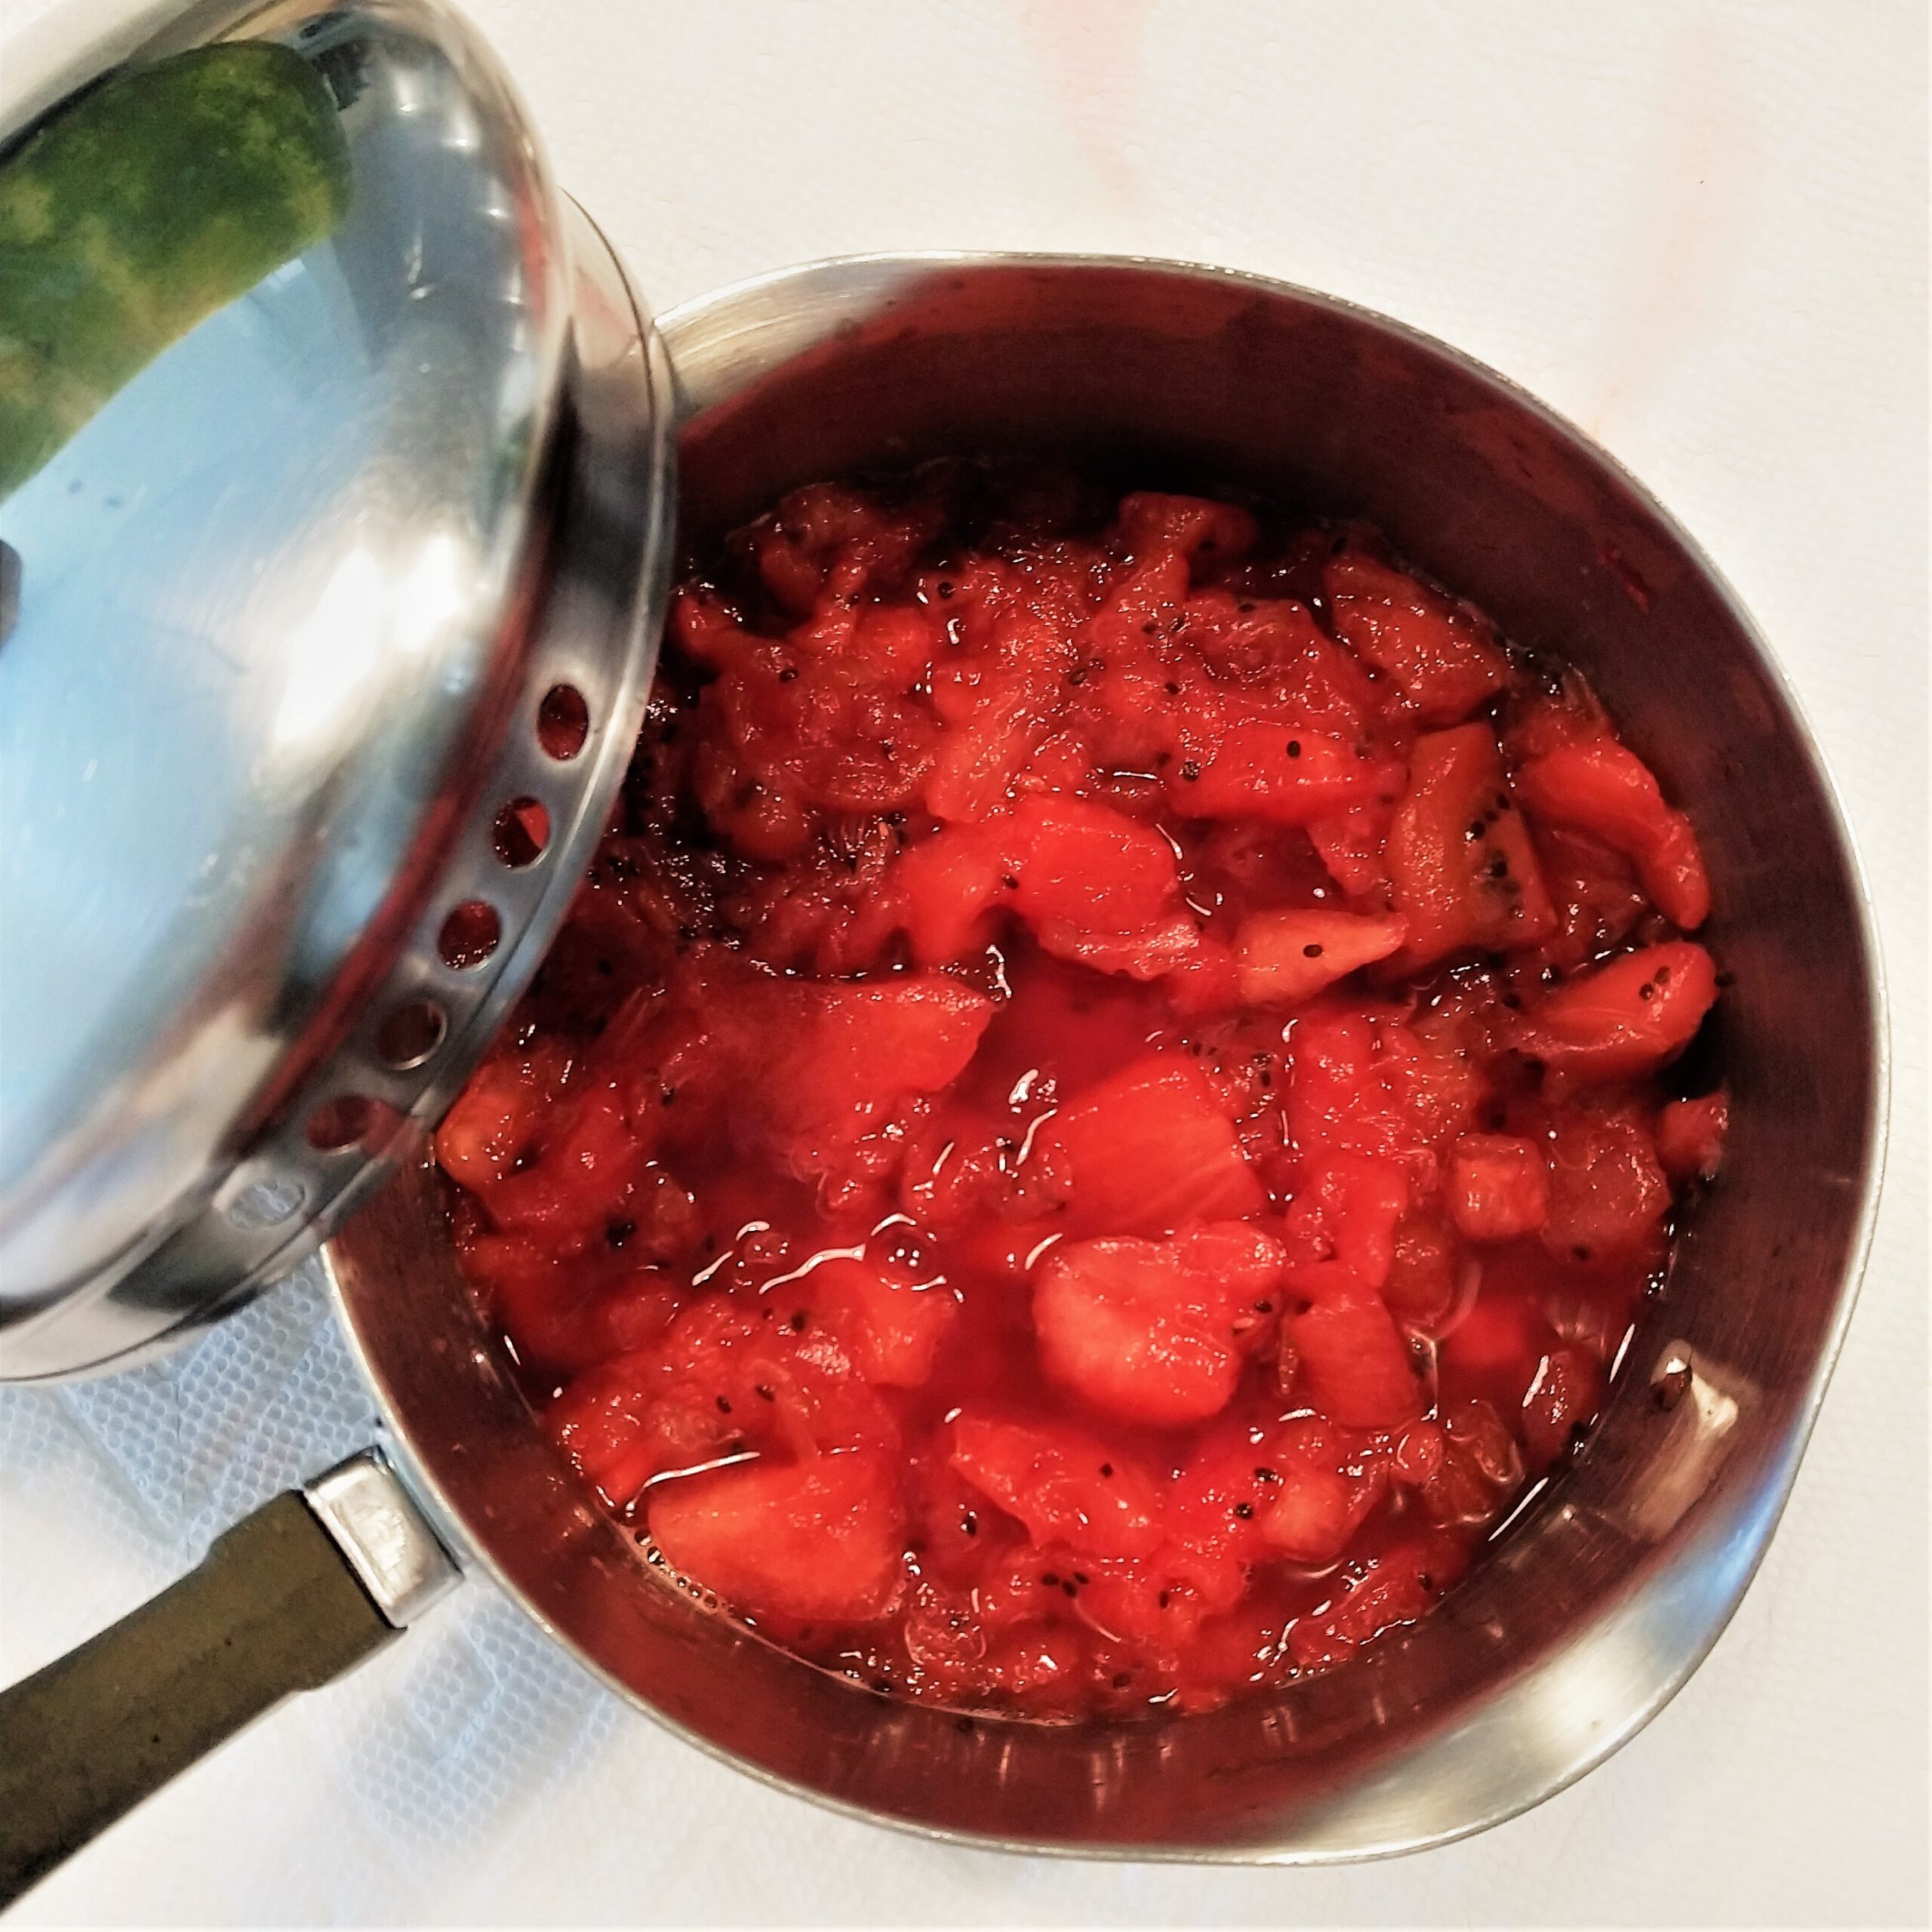
*Can reach this volume with 4 cups diced watermelon (~608 g) and ~1 cup chopped kiwis (~108 g). Use 5 cups of watermelon if you want it to be watermelon-only (~760 g)

**To brighten flavor, assist in preservation, and maintain color. You could also sub in 2 tsp apple cider vinegar.

      [Optional] 

  • granulated sugar/sweetener in case your puree is very tart. Normally the fruit’s sweet enough on its own, even with the acids (they mellow out in the oven). Don’t use honey, syrups, or any sweeteners that are liquid at room temperature.
  • fruits with little edible black seeds, like kiwi or dragonfruit, which add a visual pop. Dragonfruit is very mild; kiwi gives that punchy “watermelon-kiwi flavor.” I live in FL, so tropical fruit is affordable here.

STEP BY STEP:

  • 1. Preheat the oven to 170 F (~76.7 C), which is the average lowest temperature setting. If your settings do not go that low, reduce bake time by an hour; after that time passes, check at 15 min intervals. Line a 9 x 13 inch rimmed baking sheet with a silicon baking mat or 2 sheets of parchment paper. If using parchment paper, brush it with 1 tsp coconut oil (the culinary kind that solidifies at room temperature). Do not use wax paper or aluminum foil. Parchment paper can sometimes warp with the fruit leather and make it buckle a little, so a silicon mat is best for flattest, smoothest results. (9 x 13 in = ~22.86 x 33.02 cm).

  • 2. Examine any soft or overly ripe fruit, making sure there are no signs of mold or decay. Wash your produce if you haven’t already. Remove any fibrous, tough peels (like kiwi) and any black watermelon seeds. Dice the fruit; think 4 cups watermelon and 1 cup of kiwi/other. Use 5 cups if you are only using watermelon. Step 3 is very important if your fruit is soft or slightly under-ripened (but edible). (5-10 min)

  • 3. In a small saucepan, combine your chopped fruit with ½ cup (~118 ml) water or other liquid. I like beet juice (or plain beet water reserved from cooking beets) for how its crimson hue enhances the watermelon’s color. Cover and simmer for 20 minutes (sea level).

  • 4. Uncover the pan and stir the fruit. Mash up the chunks with a potato masher or thick wooden utensil. After tasting the fruit, add 2 tsp lemon juice. If your puree was too tart/sour for you, add 1 tsp granulated sugar/sweetener at a time to taste. Simmer on low for another 5 minutes (may take longer above sea level) so that everything thickens up.

  • OPTIONAL: This step varies according to the type of fruit used because some, such as watermelon and kiwis, are more watery than others; conversely, I skip it with mangos. I normally set a fine mesh strainer (sieve/sifter) over a bowl or mug (depending on the diameter) and ladle the fruity mixture into the sieve. Next, I press the back of the ladle against the pulpiness, pushing out as much liquid as possible while working in batches (5 minutes).

    This way, the processed mixture will have a lot less water while drying out in the oven, so it takes less time and reduces the chance of holes appearing in the fruit leather. Alternatively, you could strain the mixture over a cheesecloth for 30 minutes if you don’t have a fine mesh strainer/want a break from hands-on labor. Large holes on strainers are not recommended. I like to save the strained juice, sometimes freezing it for later projects like lemonade, syrups, sorbets, popsicles, margarita mix, etc.

  • 5. Run the mixture in a blender or food processor. Even if you don’t have a blender with a “puree” setting, process everything until it is as smooth as possible. As you pour the puree onto your prepared tray, evenly distribute the product across the surface. The layer should be at least 18 in (~0.32 cm) thick but no more than ¼ in (~0.65 cm). If you don’t have these appliances, mash and whisk the mixture until it is as smooth as possible. Pour the contents into a liquid measuring cup, aiming for a little over 2 cups (~500 ml).

  • 6. Bake at 170 F for 6.5 hours. Especially if you skipped the optional straining step, I recommend checking every 3 hours to see if any evaporated sections or holes start forming. In case that happens, just lightly smudge the puree around to cover any gaps. Keep an eye on the center of the tray: based on the thickness/water level of your puree, you may need to bake for another 15 minutes or remove it 15 minutes early.

  • 7. The fruit leather will be done when it is fully dried, but still pliable and not squishy nor super sticky to the touch. Remove the tray from the oven and let it rest for 15 minutes. Separate the silicon mat/parchment paper from the tray. If using a silicon mat, gently peel the entire rectangle of fruit leather off the mat. I always want the sheet intact, so I gingerly start peeling from the outer edges. It will also lift off parchment. I use a pizza cutter, sharp knife, or sterilized kitchen scissors to trim the uneven outer edges. They tend to be more brittle, so you can break them into small pieces to use as sprinkles if you don’t feel like eating them on the spot. Trim it down however you like and enjoy!

  • PRESENTATION & STORAGE: You can cut the fruit leather into 1 x 12 inch strips, square sections, or use sterile kitchen scissors to cut the leather into fun shapes. To make into compact rolls that make great portable snacks, I set the leather strip in the middle of a 4 x 13 inch section of parchment paper. I fold down the shorter parchment edges over the leather, then fold the longer sides over towards the middle. Roll the wrapped fruit leather like a cinnamon roll, then you can knot it together with clean kitchen twine, ribbon, or washi tape wrapped around 2-3 times. Painter’s tape and freezer tape will also get the job done better than scotch tape but they’re not as cute.

    Completely dry fruit leather will last at least 1 month stored in a sterile, airtight container.

MORE TIPS & TRICKS

  • If you try to increase the volume with something like beets, I wouldn’t recommend using more than ¼ cup of pureed beets. If you have some pickled beets on hand, they can add nice color but you should refrain from adding any extra acid and definitely add at least 1 tbsp sugar.
  • If you only have raw beets, use 1 small (think golf ball sized) beet. Peel it and slice it as thinly as possible during Step 2, then follow all the same steps.
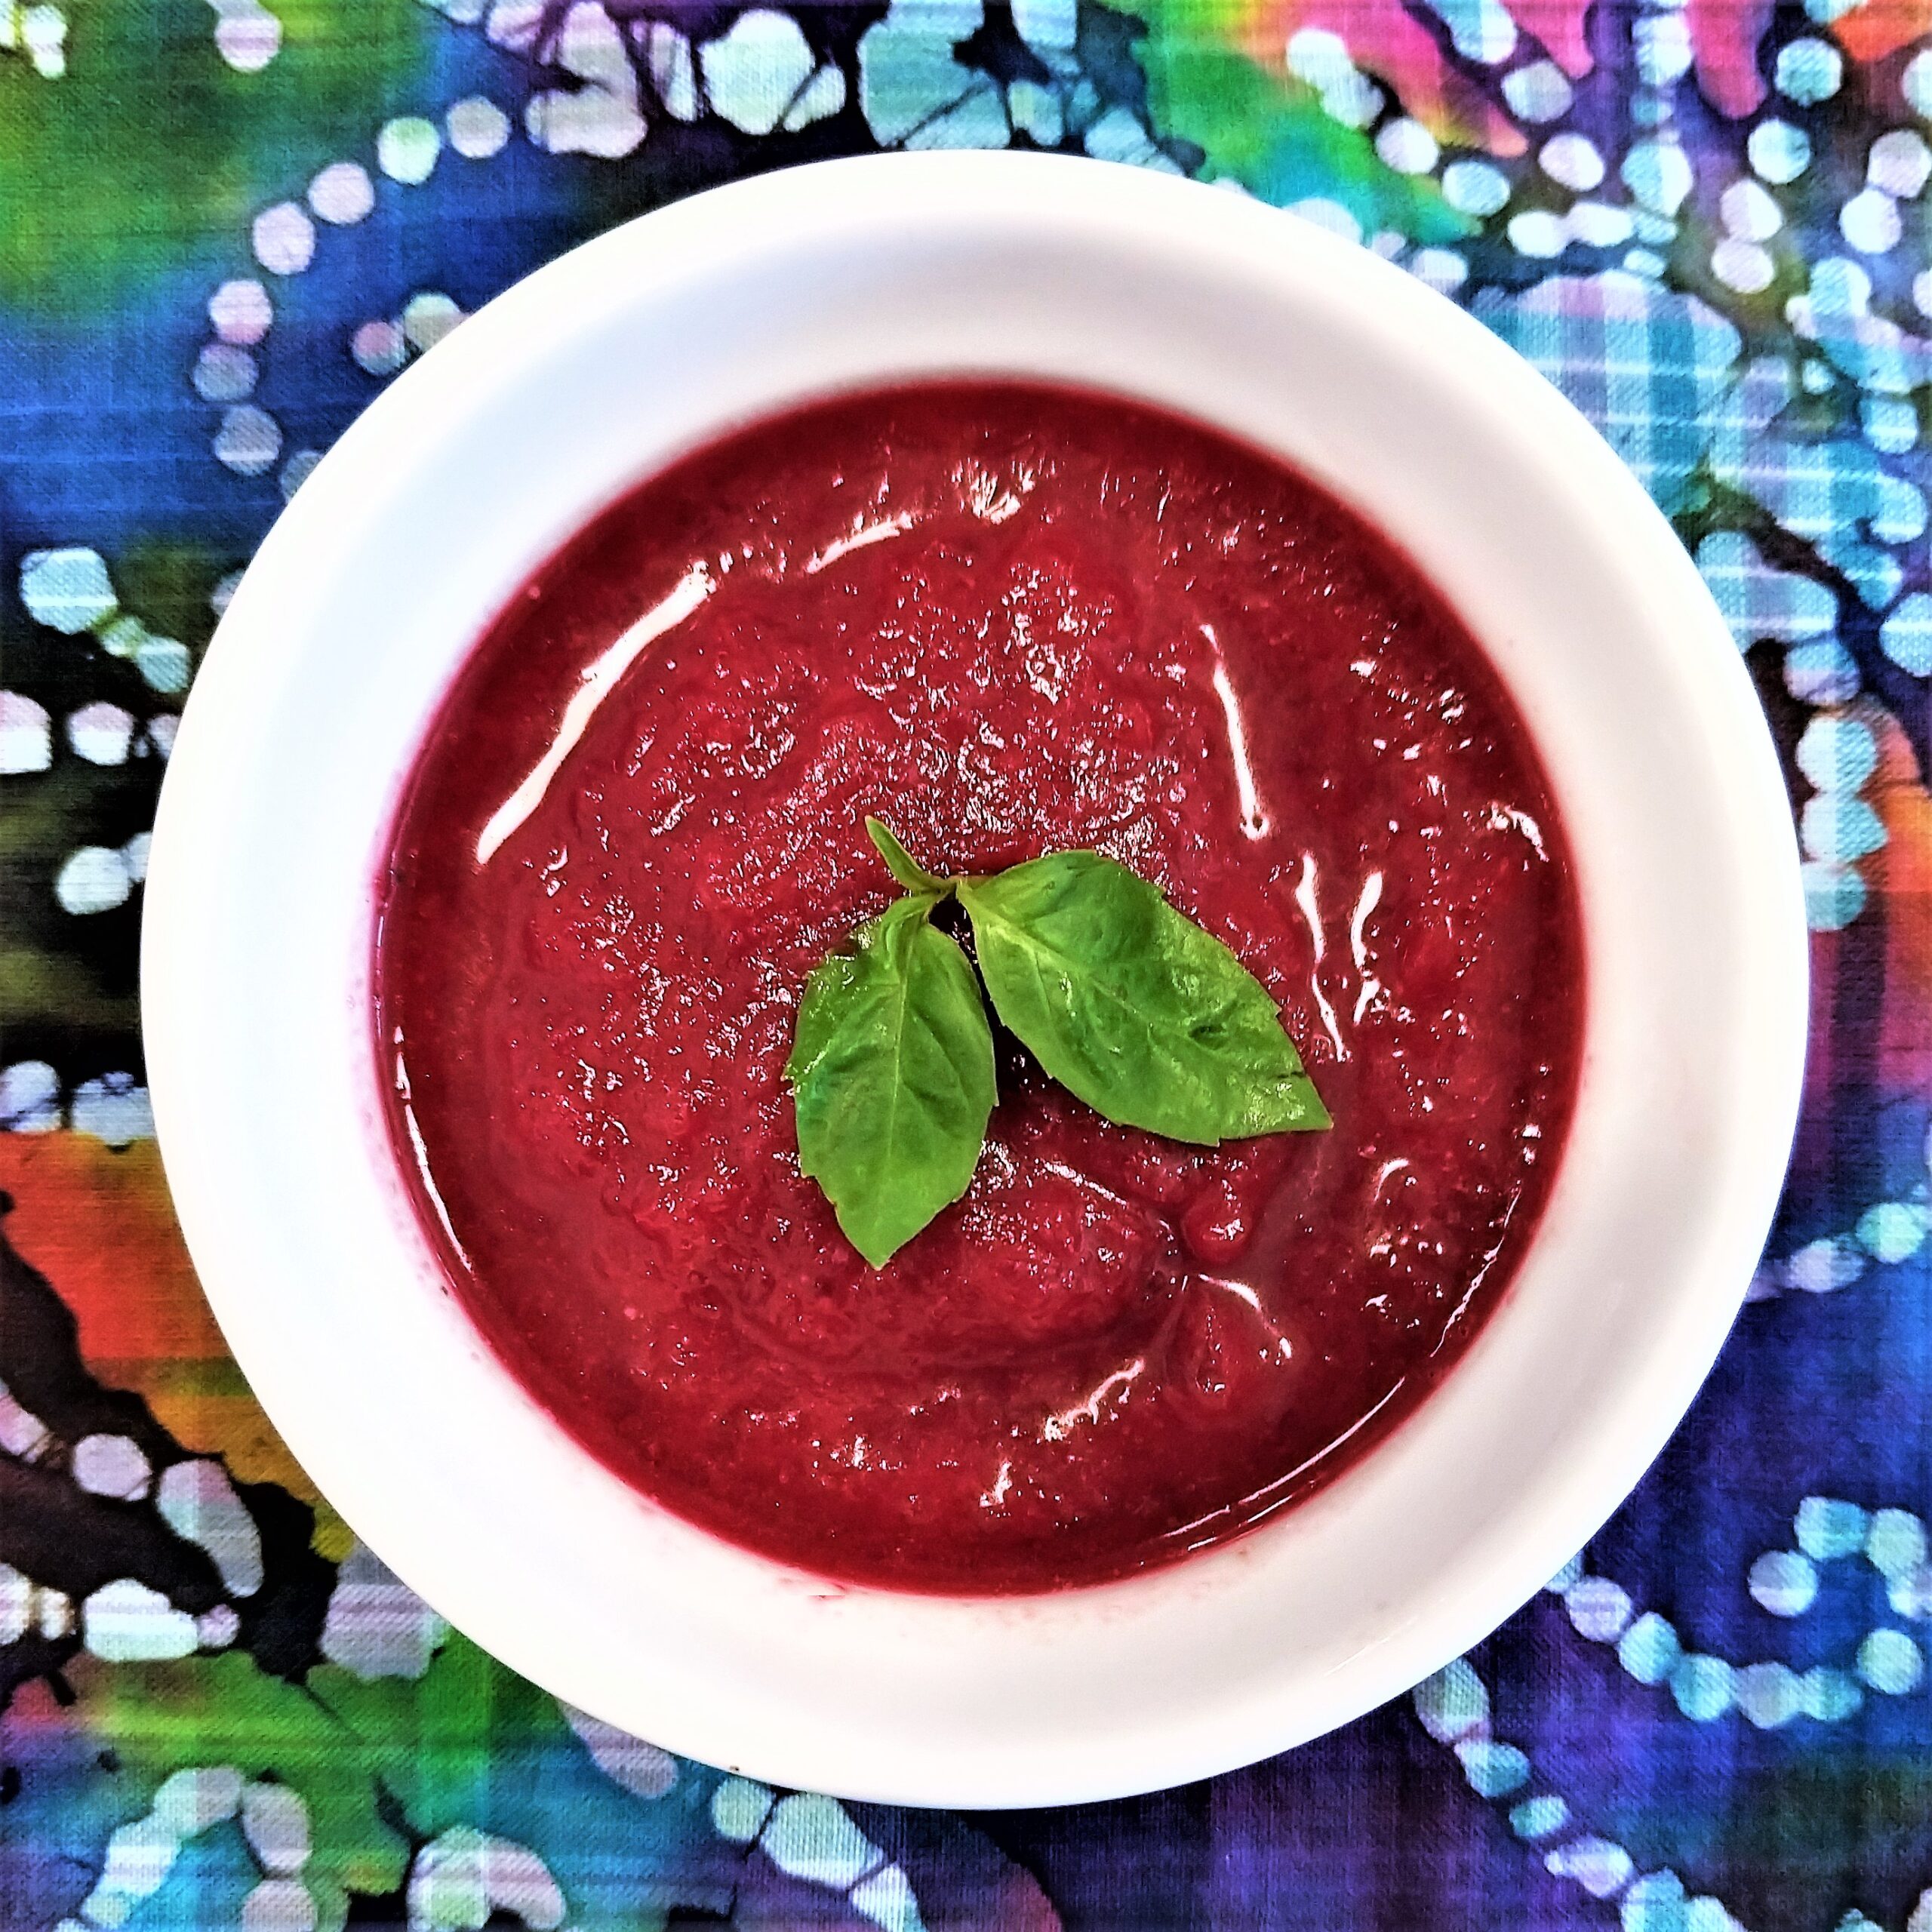
  • Other natural ways to make your fruit leather a deeper pink in color: using pomegranate juice instead of water, or liquids made from blackberries, strawberries or blueberries. Or you can add a little red food coloring for that extra 90’s vibe. Obviously, none of this is necessary, but there are so many fun ways to experiment!
  • If your puree is significantly looser and more watery after blending, you can run in through a sieve or drape a cheesecloth over a bowl and let it rest for 20 minutes. Some watermelons are a lot more fibrous than others, so it’s important to strain out as much liquid as possible before blending.
NUTRITION FACTS

Number of Servings: 7
Fiber: 0.2 g
Carbs: 9.4 g

Calories per Serving: 40 kcal
Sugar: 8.7 g
Protein: 0.2 g

Weight per Serving: 12 g
Fats: 0.3 g
Iron: 0.1 mg

All servings and nutritional measurements are approximate and will vary according to ratios of fruit (or even vegetables) used. These estimates are intended for information and guidance purposes only. Please consult a licensed nutrition or medical professional if you need assistance. 

Gluten-Free and Vegan Disclaimer: All of the ingredients listed in this recipe are available in gluten-free and vegan versions. Please do your research and verify ingredient lists, as many products can have surprisingly hidden amounts of gluten that can impact those with Celiac Disease and gluten allergies. Likewise, vegans may need to verify if products contain hidden amounts of whey or animal derived ingredients. 

Subscribe to the newsletter

Enter your email address for tasty concoctions direct to your inbox!